Rim Joist Insulation and Air Sealing: Choose the Right Assembly Before Adding Foam
Inspect water, pests, framing, fire clearances, and the building boundary before choosing rigid foam, spray foam, or another rimjoist detail. Includes a bay survey and acceptance checklist.
Direct Answer
Inspect water, pests, framing, fire clearances, and the building boundary before choosing rigid foam, spray foam, or another rimjoist detail. Includes a bay survey and acceptance checklist.
Quick Checks
- 1Remove one batt from each representative bay and inspect the wood before choosing a material.
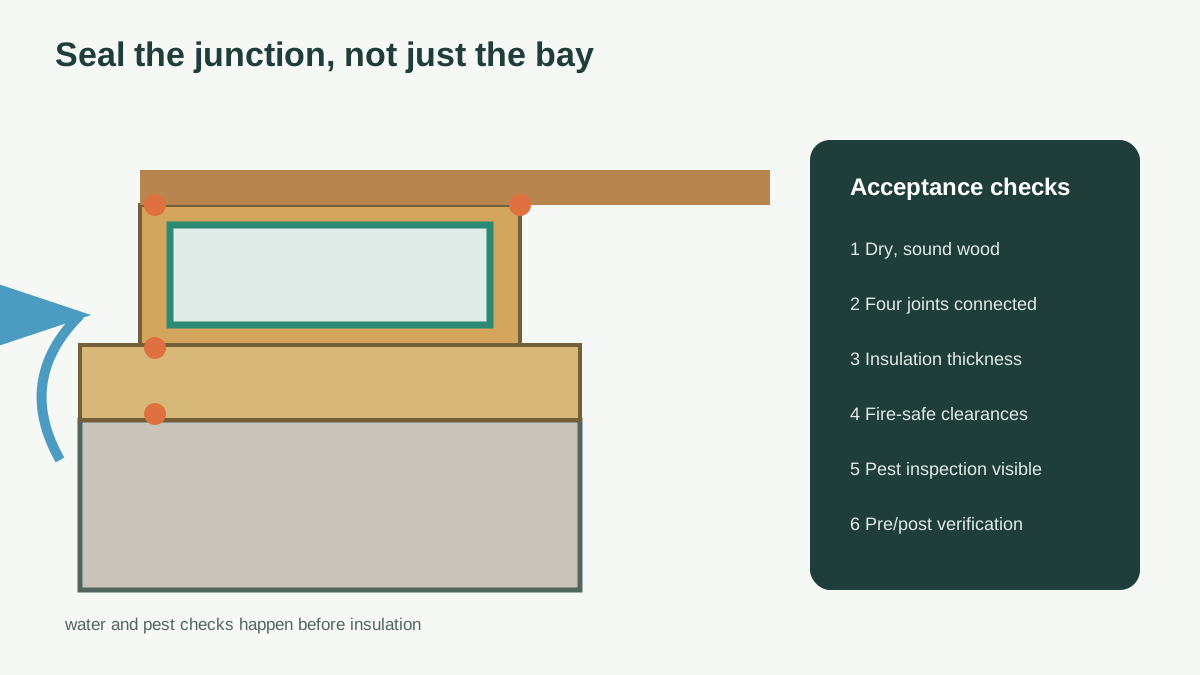
- 2Seal the foundation-to-sill, sill-to-rim, and rim-to-subfloor joints as one connected detail.
- 3Keep required clearances, fire protection, pest inspection paths, and service access visible.
The Rim Joist Is a Junction, Not an Empty Box
Short answer: Air-seal and insulate an accessible rim joist only after checking for rain entry, capillary moisture, pests, damaged wood, unsafe wiring, combustion clearances, and whether the basement or crawlspace is inside the home's thermal boundary. A good retrofit connects the foundation, sill plate, rim board, subfloor, and wall air layers. Fiberglass alone does not provide that air seal.
The rim joist—also called the band joist in some framing—is where several materials meet at the edge of a wood floor. There may be four or more leakage joints in one bay. Pipes, wires, ducts, decks, brick ledges, and additions make it less uniform than product photos suggest.
The project should solve three problems together:
- stop uncontrolled air through the junction;
- keep the interior wood surface warm enough to limit condensation;
- preserve safe drying, inspection, fire protection, and service access.
Decide Whether This Rim Is on the Boundary
If the basement or crawlspace is conditioned and inside the enclosure, the boundary usually follows the foundation wall, rim joist, and wall above. Sealing the rim supports that continuous perimeter.
If a vented crawlspace or unconditioned basement stays outside the enclosure, the boundary may follow the floor above. The rim still needs attention where it closes the floor system, but the full floor air barrier and insulation must be continuous. Do not partly insulate the floor and partly insulate the foundation wall without a clear drawing.
Use the crawlspace boundary guide when vents, exposed soil, ducts, pipes, radon, or flood openings affect the choice. Use the basement retrofit guide before making an unfinished lower level part of the enclosure.
Survey Every Bay Before Pricing
Pull back existing batts in representative bays on all sides of the house. Wear suitable protection and stop if you encounter vermiculite, extensive mold, animal waste, damaged wiring, or another suspect material.
Create a simple schedule:
| Bay/location | Framing and moisture | Penetrations | Exterior condition | Required special detail |
|---|---|---|---|---|
| North, below deck | Dark stain; wood feels dry | Hose bib | Deck ledger and flashing | Diagnose stain before covering |
| East utility bay | Clean wood | Gas pipe and cable | Above grade | Seal annular gaps; preserve service |
| South near flue | Clean | Metal vent | Masonry chase | Listed noncombustible clearance detail |
| West corner | Insect tube | None | Soil close to siding | Pest and grading review |
Record wood moisture with an appropriate meter where useful, but compare similar materials and temperatures. Surface readings do not replace diagnosis. Photograph stains before cleaning and correlate them with rain, snowmelt, plumbing use, and indoor humidity.
Stop Water Before Foam Hides It
Water can reach the rim from:
- failed deck-ledger or wall flashing;
- siding or masonry drainage defects;
- a hose bib, pipe, or condensate leak;
- capillary moisture at the foundation and sill;
- humid indoor air condensing on cold wood;
- exterior air entering behind fibrous insulation;
- roof or window water traveling inside a wall;
- groundwater or a damp crawlspace raising local humidity.
Foam does not repair those sources. It can make future inspection harder. Correct exterior drainage and plumbing, allow materials to dry, and have damaged framing assessed. EPA's moisture guidance emphasizes fixing the water source and drying wet materials promptly.
Stone, brick, and old timber sills need special care. Irregular assemblies may rely on drying paths that a low-permeance interior layer changes. A preservation-minded envelope professional should review historic or visibly damp construction.
Understand the Leakage Joints
A typical platform-framed rim includes these connections:
- foundation wall to sill gasket or sill plate;
- sill plate to rim board;
- rim board to subfloor;
- rim board ends and corners;
- floor joist ends and blocking;
- pipe, wire, duct, and fastener penetrations;
- the transition to the wall air barrier above.
Insulating the face of the rim without sealing those joints can leave a connected air path. Large holes need rigid backing or approved fire blocking, then sealed edges. Small gaps need a sealant compatible with movement, substrate, temperature, and gap width.
Batts pressed into the bay may slow heat flow but allow air around and through them. Dust-darkened fibers often reveal airflow. DOE and ENERGY STAR guidance pair rim insulation with air sealing for this reason.
Compare the Main Retrofit Methods
Cut-and-seal rigid foam
Rigid foam is cut slightly smaller than each bay and sealed at the perimeter. It lets an installer inspect each bay and control thickness. It is labor intensive on irregular framing and only works when edges and penetrations are sealed.
Specify:
- exact foam type and thickness;
- installed R-value using product data;
- edge and joint sealant system;
- substrate preparation;
- fire or ignition protection;
- termite inspection detail;
- treatment at pipes, corners, and narrow bays;
- whether an additional batt is allowed and why.
Foam-board facers and edges have different vapor behavior. Do not substitute products without checking the assembly.
Closed-cell spray polyurethane foam
Closed-cell foam can air seal and insulate irregular surfaces in one application. It can reach shallow or complex areas, but quality depends on substrate condition, temperature, chemical ratio, lift thickness, coverage, and installer control.
Ask for product safety data, evaluation reports, intended thickness, yield assumptions, re-entry/ventilation requirements, and fire-protection scope. Occupants and pets should follow manufacturer and contractor safety instructions. Off-ratio, poorly adhered, or uncured foam is not an acceptable finish.
Spray foam makes later inspection and removal harder. Do not apply it over wet, rotten, pest-damaged, contaminated, or uninspected wood.
One-part foam and caulk plus supplemental insulation
Sealant or one-part foam can close small joints and the edges of rigid blocking. It is not a practical material for filling an entire deep bay. Deep unsupported beads can cure poorly, move, or waste material.
After the air seal, a compatible fibrous batt can add R-value where the base layer keeps indoor air away from the cold rim. The exact assembly must manage condensation and fire exposure. “Caulk plus batt” is not a universal recipe for every climate and foundation.
Exterior continuous insulation
During siding or foundation work, exterior insulation can cover rim framing continuously and reduce thermal bridging. It may provide better continuity than bay-by-bay interior work, but window, door, deck, cladding, flashing, insect, fire, and foundation transitions become part of the project.
Compare it when exterior access is already planned. Do not remove functional drainage or create a hidden termite path.
Fire, Combustion, and Electrical Limits
Foam plastics often require an approved thermal or ignition barrier depending on location and code. Exposed basements, crawlspaces, utility rooms, and concealed spaces can have different rules. Product labels do not override the adopted code.
Keep listed clearances from chimneys, flues, vents, recessed devices, and heat-producing equipment. Use noncombustible sheet-metal or other approved fire-blocking details where required. Ordinary canned foam beside a hot flue is unsafe.
Do not bury junction boxes, shutoffs, cleanouts, grounding connections, or serviceable components. Damaged or obsolete wiring should be assessed before insulation. Coordinate combustion-air and pressure effects when air sealing a lower level with natural-draft appliances. Complete required post-work combustion-safety testing and maintain carbon-monoxide alarms.
Pest and Radon Details
Termites and other insects can travel behind foam. Local rules or pest warranties may require an exposed inspection strip at the top of the foundation or another detail. Get the requirement in writing before covering the rim.
Seal rodent-sized holes with pest-resistant backing before the air seal. Foam alone is not a durable rodent barrier. Keep wood debris and storage away from inspection areas.
Air sealing changes pressure paths from soil and crawlspaces. Test radon before a major lower-level enclosure project and retest afterward, following EPA guidance and local requirements. A sealed rim is helpful air control but not a complete radon mitigation system.
Joist Type Changes the Detail
Solid-sawn joists
Each bay is visually distinct and usually accessible. Corners, beams, and parallel-rim sections still need separate blocking.
I-joists
Thin webs, engineered rim board, and flange geometry affect fastening and backing. Do not cut or notch engineered members. Follow the framing and insulation manufacturers' details.
Open-web floor trusses
Open webs can connect the rim to large interior floor cavities. A rigid closure at the boundary may be more important than filling the visible edge. Coordinate ducts, plumbing, fire blocking, and structural requirements.
Balloon framing and old houses
Wall cavities may run past the floor line toward the attic or basement. The rim treatment must include approved fire blocking and preserve the wall's moisture behavior. A bay-by-bay foam insert can leave a large vertical bypass untouched.
A Worked Heat-Flow Check
Suppose a home has 160 square feet of exposed rim area. The existing assembly behaves near R-3 and the winter temperature difference is 45°F.
Heat flow = area × temperature difference ÷ effective R-value
160 × 45 ÷ 3 = 2,400 Btu per hour
At an effective R-15:
160 × 45 ÷ 15 = 480 Btu per hour
The simplified conductive reduction is 1,920 Btu per hour under that condition. It excludes air leakage, framing, wind, corners, and adjacent foundation loss. A few open chases can dominate the result, so use this only as a scale check—not a savings guarantee.
Build a Quote That Can Be Compared
| Scope item | Require in writing | Acceptance evidence |
|---|---|---|
| Boundary | Floor or foundation perimeter and transitions | Section sketch |
| Existing condition | Moisture, pests, damage, wiring, flues | Bay schedule and photos |
| Air seal | Every joint and large-opening method | Photos before insulation |
| Insulation | Product, thickness, installed R-value | Depth/coverage check |
| Water | Repairs and drying requirement | Moisture record |
| Fire | Clearances, blocking, protective covering | Product/code documentation |
| Pests | Inspection gap and resistant backing | Final visible detail |
| Mechanical | Combustion and ventilation effect | Safety test where applicable |
| Verification | Leakage, surface temperature, or visual test | Pre/post record |
| Cleanup | Removed batts, foam debris, labels, access | Final walkthrough |
Avoid quotes that say only “spray rim joists” or price by linear foot without documenting bay depth, obstructions, moisture, and finish protection.
Commission the Work
Before covering the assembly:
- compare each bay with the survey;
- confirm wet or damaged wood was not concealed;
- photograph foundation-to-sill, sill-to-rim, and rim-to-subfloor seals;
- check corners, parallel rims, beam pockets, and penetrations;
- measure foam thickness at representative locations;
- inspect adhesion, shrinkage, gaps, and missed surfaces;
- verify fire and pest details;
- confirm service access and labels remain visible;
- run specified pressure or smoke diagnostics safely;
- complete combustion and radon follow-up where required.
Repeat the cold-floor or draft measurements under comparable weather. The cold-floor diagnosis guide provides a room map that works as a baseline.
Work Through the Difficult Bays
Contractors often price the open bays and improvise around the hard ones. Those missed locations can dominate leakage. Put them in the scope before bids arrive.
Parallel rim sections
Where joists run parallel to the foundation, the first joist can hide the rim board. Access may be narrow or blocked. Filling the visible slot without seeing the foundation-to-sill and rim-to-subfloor joints leaves uncertainty. Options may include careful access from below, an exterior continuous detail during siding work, or a designed closure at the first joist. Do not drill engineered framing casually.
Beam pockets and columns
Steel or wood beams can interrupt the rim. Air can move around pocket edges and through hollow masonry. Metal also creates a strong thermal bridge and may condense. The detail must allow structural inspection, account for corrosion and fire protection, and avoid trapping water against beam ends.
Deck ledgers
Deck fasteners and ledger flashing penetrate or cover the exterior rim. Interior staining at that location needs exterior diagnosis. An interior foam layer cannot correct water running behind the ledger. Coordinate deck safety and wall drainage with a qualified contractor before covering the interior.
Plumbing and hose bibs
Cold-water lines can condense in summer; hose bibs can leak or freeze. Insulation changes the pipe's temperature exposure. Keep shutoffs and joints accessible, use compatible pipe insulation where needed, and make sure a frost-proof sillcock slopes and drains as its manufacturer requires.
Ducts and air handlers
Sheet-metal boots and panned returns may cross the rim. Seal duct joints with approved duct materials and seal the duct-to-boundary opening separately. Do not use building foam as the only duct-joint seal or bury a filter, damper, or service panel.
Climate and Drying Direction
The rim sits between indoor air, outdoor weather, foundation moisture, and the wall above. Its vapor profile changes by season and climate.
In a cold climate, interior moisture reaching a cold rim can condense. An air-impermeable interior layer keeps that air away from the wood and provides thermal resistance. In a hot-humid climate, outdoor moisture and inward vapor drive can change the risk. Exterior foam, masonry veneer, reservoir cladding, and air-conditioning set points matter.
Do not choose a vapor-impermeable layer by climate label alone. Review:
- exterior sheathing and water-resistive barrier;
- siding, brick, stucco, or deck attachment;
- foundation material and capillary break;
- interior temperature and humidity;
- foam permeance at installed thickness;
- whether the assembly can dry inward, outward, or both;
- historic moisture evidence.
The goal is not to make every layer vapor closed. It is to stop bulk water and air transport, control diffusion to a safe level, and preserve a realistic drying path.
DIY Material Planning Without Product Hype
For a simple dry rim, measure bay width, height, depth, and count. Add separate quantities for corners, beam pockets, and parallel sections. Product coverage claims assume a thickness and ideal yield; field waste and irregular geometry matter.
For rigid foam, plan:
- full sheets and a safe cutting area;
- a small perimeter gap sized for the chosen sealant;
- rigid backing for openings too large for sealant;
- compatible adhesive or mechanical attachment;
- fire-protective covering and fasteners;
- pest-resistant mesh or sheet metal at entry holes;
- labels and photographs for concealed products.
For two-component spray foam, the safety and quality burden is higher. Temperature, chemical storage, mixing, ventilation, personal protective equipment, ignition sources, and re-entry requirements all matter. A disposable kit is not automatically the safer or cheaper choice once setup, waste, and uncertain yield are included.
One-part foam cans suit edges and modest gaps when used within their listed limits. Overfilling can bow finishes or leave uncured material. Read the product's gap, substrate, temperature, flame-spread, and cure instructions.
A Pre/Post Comfort Worksheet
Choose three representative locations before work: an exterior floor edge above a clear bay, a difficult corner, and an interior control point. On two comparable cold days, record:
| Measure | Before | After | Conditions to match |
|---|---|---|---|
| Outdoor temperature | Within a reasonable range | ||
| Wind speed/direction | Note major differences | ||
| Indoor set point | Same schedule | ||
| Rim interior surface | Same marked spot | ||
| Floor edge surface | Same finish and spot | ||
| Interior control surface | Shows HVAC/weather shift | ||
| Smoke movement | Same pressure setup | ||
| Basement RH | Note dehumidifier operation |
Subtracting the interior control change from the perimeter change can help separate a whole-house temperature shift from a local improvement. It is still a field comparison, not a laboratory U-factor test.
When Rim Work Should Wait
Pause the insulation contract when you find:
- active rain or plumbing water;
- wood that is soft, delaminated, or structurally altered;
- termite tubes or current pest activity;
- extensive fungal growth or contaminated insulation;
- vermiculite or suspect asbestos-containing material;
- unsafe wiring, open junctions, or overheating;
- unknown flues or missing combustion clearances;
- a basement or crawlspace boundary that has not been decided;
- required flood openings or unresolved groundwater;
- exterior work that will soon change the same assembly.
These are not reasons to abandon the project. They define the work that must happen first.
Retrofit Sequence by Trade
- Envelope or audit lead: maps leakage, moisture, and the intended boundary.
- Water/pest/structural trades: correct active defects and document clearance.
- Electrical/HVAC/plumbing: repair unsafe or inaccessible services.
- Air-sealing installer: closes large and small paths with safe materials.
- Insulation installer: adds the specified thermal layer without gaps.
- Fire-protection trade: installs required covering and fire blocking.
- Verifier: checks coverage, leakage, combustion, radon, and comfort evidence.
One contractor may perform several roles. The sequence still matters because each layer needs inspection before the next one hides it.
Common Failure Modes
- Batts are removed, then new batts are installed without an air seal.
- Rigid foam sits loosely in bays with unsealed edges.
- Spray foam misses the sill joint behind pipes or wiring.
- Exterior rain entry is covered instead of repaired.
- Foam hides termite tubes or blocks required inspection.
- A flue clearance is filled with combustible product.
- The floor and foundation wall each become half a boundary.
- The visible rim is sealed but open-web joists remain connected outdoors.
- Fire protection is left for “later” and never installed.
- No one checks radon or natural-draft appliances after tightening.
Frequently Asked Questions
Is fiberglass enough for a rim joist?
Not by itself. It does not create a reliable air barrier. Use a designed air-sealing layer and compatible insulation.
Should I use rigid foam or spray foam?
Both can work. Rigid foam offers inspectable bay-by-bay work; spray foam handles irregular geometry. Moisture, fire, pests, substrate, access, and installed quality decide.
Can I seal a damp rim joist?
Find and correct the water source first. Dry and assess the wood before covering it.
How much R-value is enough?
Use the adopted code, climate, available depth, adjacent wall/floor assembly, and condensation control. More nominal R-value does not repair missed air paths.
Does rim-joist sealing help cold floors?
It can reduce perimeter drafts and warm the floor edge when leakage is the cause. Whole-floor insulation, crawlspace conditions, windows, slabs, and HVAC may also matter.
Can I do this myself?
Simple dry, accessible bays away from hazards may be manageable for an experienced homeowner. Flues, wiring, pests, mold, old masonry, spray chemicals, combustion equipment, or structural damage warrant qualified help.
Will this make the basement too tight?
Tightening changes ventilation and pressure. Assess indoor air, radon, and combustion rather than relying on foundation leakage as ventilation.
Do I need to remove old batts?
Remove enough to inspect and air seal. Reuse depends on cleanliness, dryness, fit, and the new assembly; contaminated or damaged material should not go back.
What to Read Next
Use the blower-door test guide to turn a vague “drafty basement” complaint into pre/post leakage evidence before accepting the rim-joist work.
Sources and Verification
Editorial Review
EnergyBS Editorial Team
EnergyBS publishes practical homeowner guides. Important program, product, and cost claims should be checked against the linked source and local project documents before you commit to work.
Related Guides
View All ArticlesWhy Are My Floors So Cold? Diagnose Air Leaks, Insulation, Crawlspaces, and Slabs
Map coldfloor patterns, separate drafts from conduction and stratification, choose the correct floor or foundation boundary, and verify comfort improvements.
Basement Insulation and Mold Prevention: A MoistureFirst Retrofit Guide
Diagnose bulk water, capillary moisture, humidity, condensation, soil gas, and hidden damage before choosing a basement wall, rimjoist, or floor insulation assembly.
The Physics of Air Sealing: Why Your RValue Doesn't Matter (If You Don't Seal)
Insulation is just a sweater. Air sealing is the windbreaker. We explain the physics of the Stack Effect, why Rvalues lie, and how to stop your home from leaking energy like a sieve.